Adding onto a Cape home is one of the smartest ways to boost its value and make it work better for how you live now - more bedrooms for growing families, an open kitchen, a screened porch, or space for retirement without moving. Done right, an addition can transform the house while keeping its classic look and fitting seamlessly into the neighborhood.
But additions on Cape come with real risks. The wrong move can lead to denied permits, blown budgets, or a final result that feels mismatched or poorly thought out. We've seen projects stall for years or end up costing far more than planned because of surprises that could have been caught early.
The four most common pitfalls we run into are:
We here at O'Neill Bowes have guided dozens of additions and renovations on Cape Cod over our combined 25+ years of experience. We know the pitfalls inside out, and we use three custom strategies to sidestep them:
These strategies aren't complicated - they're practical steps that keep the project on track, on budget, and true to what the client really wants. In the sections ahead, we'll break down each pitfall with real examples and show how our approaches avoid them so your addition ends up being an asset, not a headache.
One of the quickest ways an addition on Cape Cod goes sideways is by not dealing with zoning, permitting, and septic issues right from the start. While it’s very tempting to focus on the fun part - layouts, finishes, square footage - we can’t assume the land and town rules will just work out. It’s rare that they do.
Zoning bylaws hit first: setbacks from property lines, streets, or wetlands dictate how close you can build; lot coverage ratios limit how much impervious surface (roof, driveway, patio) you can add before runoff becomes a problem; historic district rules in older villages can restrict materials, roof pitches, or even window styles. Then there's the Massachusetts Stretch Energy Code: additions and renovations over 1,000sf can trigger a full energy retrofit of the existing house - insulation upgrades, new windows, mechanical systems - that turns a simple bump-out into a massive, expensive overhaul. We've seen retirees or families planning modest expansions get blindsided by this, ending up with costs and timelines they never expected.
Septic is another major consideration. Many Cape Cod lots have older systems that aren't sized for added bedrooms or bathrooms. If the addition’s footprint overlaps the septic area or leach field, you need variances, relocation, or a new Title 5-compliant design - any of which can delay permitting by months or add tens of thousands in costs. Not accounting for future features (like a screen porch or pool) early can lock you into bad placements later, forcing utility reroutes or redesigns.
Something we’ve seen more than once: a client plans an addition without checking septic location or zoning setbacks. Midway through design, they learn the new footprint blocks the leach field or exceeds impervious limits. The fix becomes expensive - moving septic, redesigning the addition, or scaling back features.
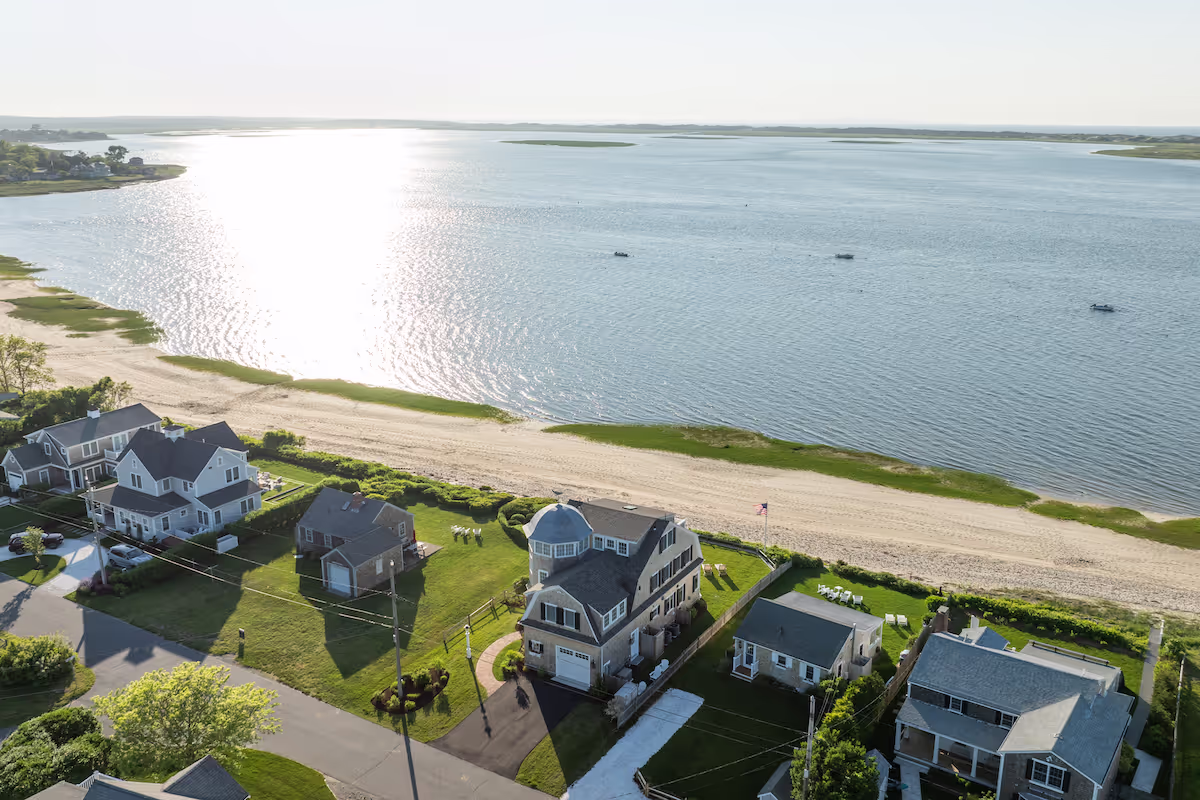
In one recent project in Osterville, the client wanted a screen porch and, eventually, a pool. We flagged the septic footprint early during preconstruction planning. By locating the septic outside the proposed addition and porch area, we avoided future utility conflicts and reruns. That simple upfront decision kept the project moving, saved significant rework, and left room for the pool without extra permitting headaches later.
Ignoring these layers early turns a straightforward addition into a regulatory mess. The fix is simple: address zoning, permitting, and septic during the initial site assessment and team meetings. Get the civil engineer involved right away to map setbacks, impervious coverage, and septic locations. It adds a little time upfront but saves far more later - keeping your addition on budget, on schedule, and fully compliant.
Roofline integration is one of the trickiest parts of any addition, and it's where a lot of projects end up looking, or even functioning, off. The original house has a specific roof shape - steep pitch, gable ends, certain eave details - and when you add onto it, the new section has to tie in without creating awkward transitions, drainage problems, or visual mismatches.
The most common failure is mismatched pitches. If the addition's roof slope doesn't align with the main house, you get odd angles that catch the eye or - worse - create low spots where water pools or snow dams form. Water backs up against the face of a gable or collects in valleys, leading to leaks, ice dams in winter, or rot over time. We've seen additions where the new pitch was too flat (near 0-pitch in spots), causing standing water and forcing emergency fixes later. Snow damming is especially bad on Cape Cod - thick winter snow can slide down and overload lower sections if the transition isn't right.
Another frequent issue is mismatched headers and sills. The existing house has a certain roof header height and sill detail; if the addition doesn't line up, you end up with a step or bump in the ceiling line inside, or a visible jog on the exterior. Sometimes the architect drops the new roof slightly below a ridge to fit a window or dormer, but if it's not handled carefully, it looks like a mistake rather than an intentional design.
The fix is planning and execution. The architect needs to study the existing headers, sills, and rooflines early - measure exactly where they sit and how the addition will connect. Custom crickets (small peaked diverters) can redirect water away from valleys or low spots, and pitches should be matched as closely as possible to avoid dams. Subtle drops for windows or dormers can work if the trim and shingle coursing carry through consistently.
In practice, we've avoided these problems by getting the roof details locked in during preconstruction. By mapping the existing structure and testing connections on paper (or in models), we make sure the addition flows naturally - both for drainage and appearance. It's not always glamorous work, but it prevents leaks, ice dams, and that "added-on" look that can hurt resale value or neighbor approval.
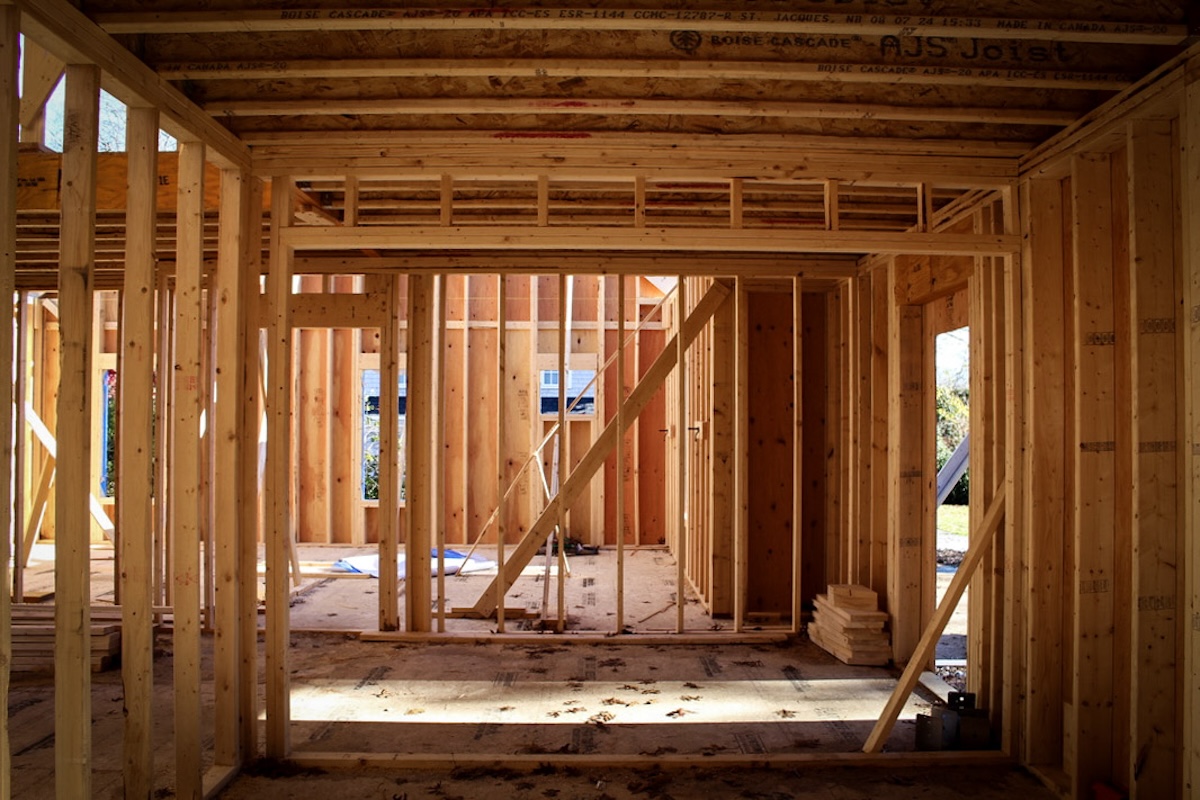
Foundation and floor alignment issues are problems that don't always show up until you're deep into construction - and by then, they're expensive to fix. When adding onto an existing home, the new section has to tie into the old foundation and floor levels perfectly. If there's even a small mismatch in height, you end up with a step, slope, or uneven transition inside that feels off and can cause practical headaches later - doors that swing oddly, tripping hazards, or flooring that doesn't line up.
The root cause is often the existing structure's condition. Older homes may have settled slightly, or the foundation sill plate might not be perfectly level. When you attach the new foundation, any discrepancy gets amplified. We've seen additions where the new floor ended up ½ inch higher or lower than the main house, forcing awkward ramps, custom thresholds, or even re-pouring sections to match.
Another surprise comes when opening walls. You plan for a clean connection, but once the drywall or siding is off, you discover rot, outdated framing, or an old roof that's sagging or needs replacement. That "ground ball" can cascade: if the roof needs work, it affects the header heights; if framing is compromised, it impacts load-bearing points and floor joist alignment. These discoveries derail timelines and budgets if not anticipated.
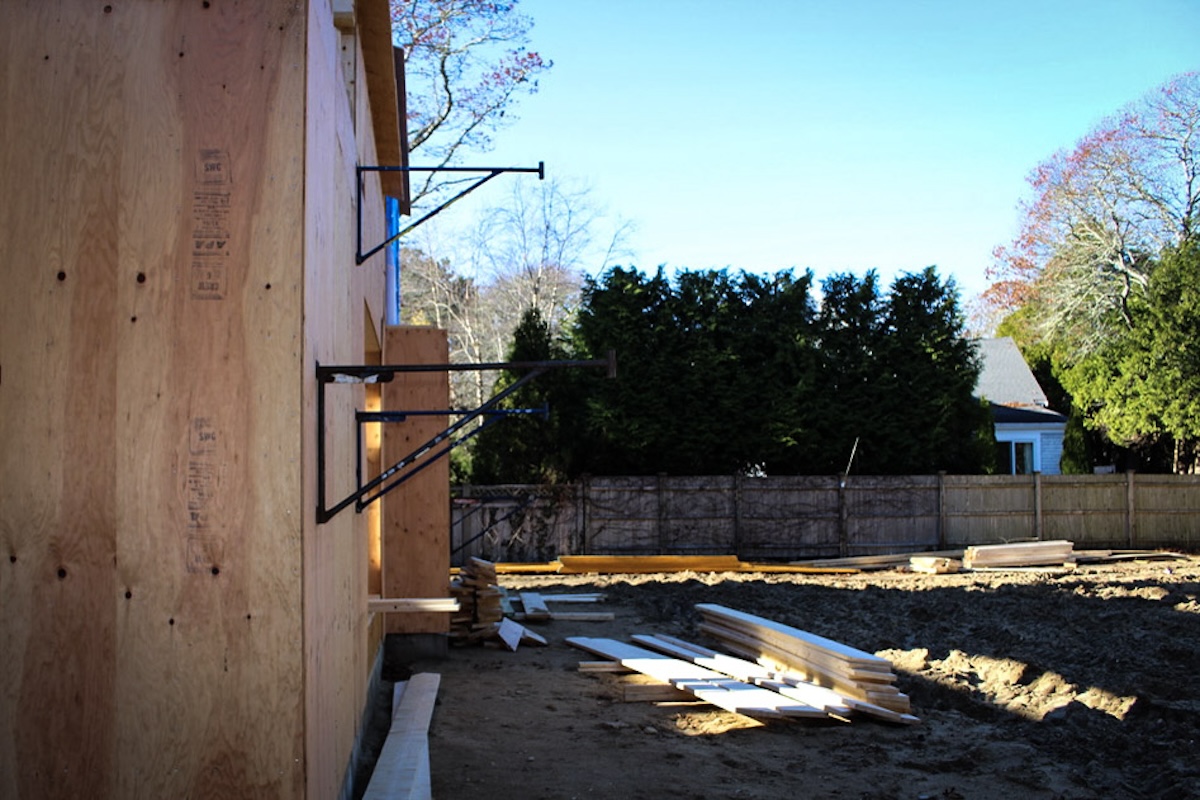
The fix is proactive and precise. We drill into the existing foundation and install epoxy rebar every few inches down the wall to pin the new and old sections together - creating a true symbiosis so there's no separation or shifting over time. The concrete company cuts in access hatches for slab pours and mechanicals, ensuring everything bonds correctly without guesswork.
In practice, we've avoided these surprises by getting the foundation details locked early - measuring existing sill heights, checking for settlement, and modeling connections in preconstruction. That way, the architect designs the addition to meet the real conditions, not assumptions. It keeps the floor levels flush, eliminates future tripping issues, and prevents the "added-on" feel that can hurt usability and resale value. Addressing alignment upfront turns a potential headache into a seamless, solid connection that lasts.
Poor communication is the quiet killer of many Cape Cod additions and renovations. When surprises come up - and they almost always do - the way those surprises are handled determines whether the project stays on track or turns into a source of frustration and eroded trust.
The biggest communication failures start early: not sharing the real budget. Clients sometimes hold back because they're worried it'll limit design, or fear that admitting a number higher than a builder may expect, could be used to their disadvantage but, without that number, the architect and team can't tailor plans to reality. We could end up spending weeks on drawings that are too expensive or too ambitious, only to backtrack when the truth comes out. That kills time, racks up fees, and leaves everyone disappointed when the final scope has to shrink.
During construction, challenges will arise - unexpected conditions once walls are opened. Rot in framing, outdated electrical, or structural surprises that weren't visible in the initial inspection. In new construction or major additions, these are almost guaranteed. If the client isn't prepared for them ("things will generally come up and you'll have to field some ground balls"), a small discovery can feel like a betrayal. Poor updates or vague explanations make it worse - trust breaks down, decisions get emotional, and the project drags.
At O'Neill Bowes, we avoid this pitfall by making transparent communication and budget clarity non-negotiable from day one. In preconstruction, we push hard for the real budget to come out - it's our job to guide design and cost to match it. We lay out obstacles early, provide multiple solution paths (including financial alternatives), and let the client prioritize based on what's most important to them (aesthetic vs. budget). If it's going to be tight, we say so upfront and help focus spending on bang-for-buck items that stand the test of time: kitchens, appliances, countertops, bathrooms, oak floors - instead of showy but short-lived finishes like plaster over sheetrock.
When surprises hit during the build, we give full context immediately - no sugarcoating. We explain what we found, the impact, the options, and our recommendation. The client chooses the path that fits their goals and wallet. This keeps expectations aligned, reduces stress, and turns potential conflicts into collaborative fixes. The result is a project that stays on track and an addition that feels like a true extension of the home—because trust was never compromised.
The foundation of avoiding addition pitfalls is front-loading the work in preconstruction with strong team involvement. When obstacles are identified and solutions mapped out early - before design gets locked in - most surprises never become major problems.
At O'Neill Bowes, we treat preconstruction as the critical first phase of every project. This is where we map zoning setbacks, lot coverage limits, historic rules, energy code triggers, and septic locations. We bring the civil engineer in immediately to delineate wetland buffers, calculate impervious surface ratios, and check septic footprints against the proposed addition. If the client has future plans - like a screen porch, pool, or patio - we plan the septic and utilities around those now to avoid expensive reroutes later. In the Osterville project, we placed the septic outside the proposed porch and pool footprint during preconstruction. That one decision kept future features simple, compliant, and free of rework.
Homeowners often defer to the pros at this stage, and that's the right move. We coordinate with the full team - architect, civil engineer, surveyor, wetland specialist if needed - so everyone works from the same accurate constraints. The architect designs within the real limits from day one, not against them. We also review the existing structure thoroughly: roof condition, foundation state, framing - flagging anything that could cause downstream issues.
This early, structured planning keeps timelines shorter, budgets more predictable, and the project moving forward without unnecessary delays or redesigns. It's the difference between an addition that feels seamless and one that feels like a series of fixes.
When an addition has to tie into an existing home, precise matching and smart workarounds are what keep it looking and performing like it was always there. This strategy focuses on the physical connections - foundation, roof, framing - so the new section doesn't feel tacked on or create long-term issues.
For foundations, mismatched heights or poor bonding between old and new can lead to settling, cracks, or uneven floors. Our fix is drilling into the existing foundation and installing epoxy rebar every 16 inches into the existing foundation. This pins the two sections together, creating a strong, unified bond. The concrete company cuts in access hatches for inspection and pouring, making sure everything integrates cleanly without separation over time. It's a reliable way to avoid future structural headaches and keep floor levels flush.
Roof connections are just as critical. If the new roofline doesn't align with the existing headers, sills, or pitch, you risk water pooling, snow dams, or awkward transitions. We work with the architect to match pitches as closely as possible and use custom crickets (small peaked diverters) in valleys or low spots to redirect water away from potential problem areas - no 0-pitch sections or flat spots that collect snow and ice. Subtle adjustments, like slight drops for windows or dormers, are blended with consistent shingle coursing and trim details so the eye doesn't catch the change.
The architect plays the lead role here - studying the existing structure early, measuring headers and sills exactly, and designing the blend. We make sure those details are locked in preconstruction so there are no surprises when the build starts.
This approach isn't about flashy changes - it's about quiet, precise execution. The addition ends up seamless: structurally sound, weather-tight, and visually integrated. It avoids the "added-on" look that can hurt resale or neighbor approval, and it keeps the home functioning as one cohesive unit for decades.
The third strategy that keeps additions on track is making transparent communication and budget clarity non-negotiable from the very beginning. When surprises happen (and they almost always do), the way you talk about them determines whether the client feels in control or blindsided.
O'Neill Bowes insists on full transparency in preconstruction and throughout the build. We lay out every potential obstacle we see - zoning limits, septic issues, energy code triggers, structural surprises when opening walls - and provide multiple solution paths with clear pros, cons, and costs. No sugarcoating or vague answers. The client gets the full picture so they can prioritize: aesthetic vs. budget, short-term vs. long-term. We present alternatives (e.g., scale back a feature to save money or invest in a workaround for future-proofing) and let them choose what fits their goals.
Budget clarity is essential early. Clients sometimes hesitate to share their real number because they worry it'll limit creativity, but without it, time gets wasted on designs that can't be built. We push for that conversation sooner rather than later - it's our job to guide the scope to match the wallet. Once we have the budget, we help focus spending on bang-for-buck items that stand the test of time: kitchens, appliances, countertops, bathrooms, oak floors - instead of showy finishes like plaster over sheetrock. Those choices add lasting value and make the addition feel like a smart investment.
During construction, we keep the same approach: immediate context on any ground ball (unexpected rot, framing issues, etc.), the impact, the options, and our recommendation. The client decides - no hidden surprises or unilateral calls. This builds trust, keeps decisions collaborative, and reduces stress. The result is an addition that meets expectations, stays on budget, and feels like a true extension of the home - because communication was never a weak link.
Cape Cod additions and renovations offer tremendous value - extra living space, better flow, and increased home worth - but there are common pitfalls can turn a good idea into a headache. Here's a quick recap of the four we see often:
O’Neill Bowes Building Company has spent a combined 25+ years guiding clients through these exact challenges on Cape Cod. We don't just build - we’re reliable guides with three straightforward strategies that sidestep the pitfalls:
These aren't complicated tricks - they're practical habits that keep expectations realistic, budgets on track, and the final addition feeling like a natural part of the home. We adapt to your vision, work within the regs & the teams, and focus on timeless investments that stand the test of time.
•••
Planning a project on Cape Cod?
Call Nick anytime to discuss: 774.487.0475